Synchronization
What is the luckycloud Sync Client?
The luckycloud Sync Client is software that allows you to synchronize your data on your local computer with luckycloud. Once you have downloaded and set it up, you can select directories and folders that luckycloud will automatically synchronize from then on. All changes are automatically made on all synchronized devices.
Learn in this tutorial how to easily download and install the luckycloud Sync Client:
How do I install the Sync Client?
You can install the luckycloud Sync Client on Windows, Mac, or Linux devices. First, download the appropriate software for your operating system. You can find it in the customer dashboard under "Downloads" and then "Programs".
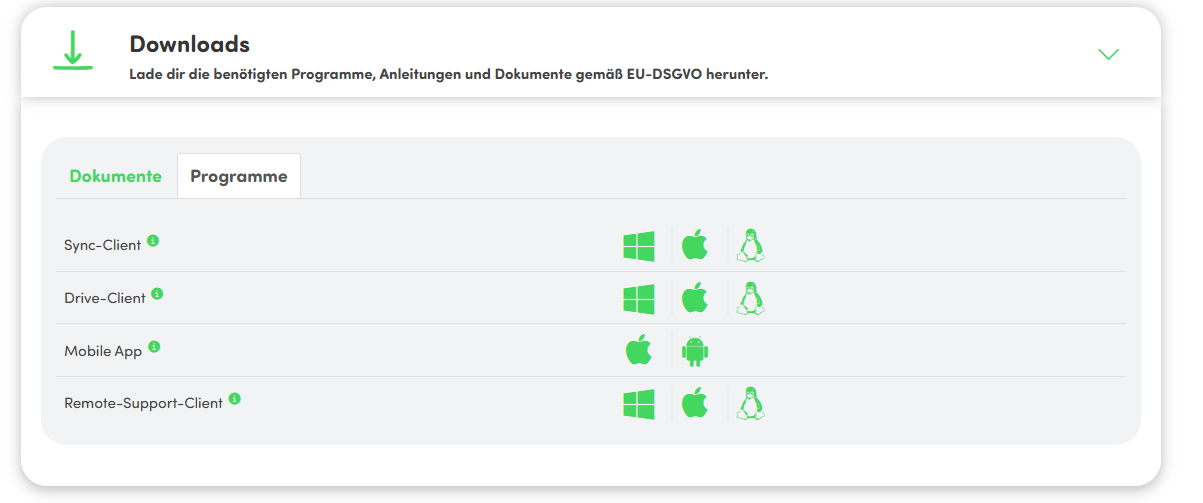
Alternatively, you can access our luckycloud Download Center via our website. First, install the luckycloud Sync Client by opening the downloaded installation file and following the installation instructions.
Here you will find detailed instructions for the installation processes for the respective operating systems:
How do I add my account to the luckycloud Sync Client?
- After successfully installing the Sync Client, you can log in for the first time with your luckycloud credentials.
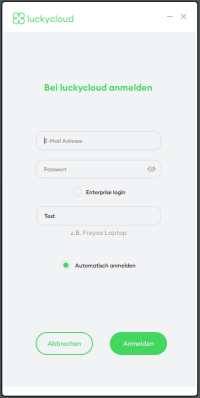
- Enter your luckycloud login details to connect the Sync Client with your luckycloud account.
| Option | Input |
|---|---|
| Username: | your full email address |
| Password: | your luckycloud password |
By the way: If you use luckycloud Enterprise, select the "Enterprise Login" option and then enter your domain. You can also check a box to enable the user-friendly option for authentication and access management through Single Sign-On (SSO). Users then only need to enter the server address to authenticate. This reduces effort and increases security as you don't have to enter passwords multiple times.
- Click "Login" to complete the account setup.
In the next step, you can choose between a "Simple Setup" and an "Advanced Setup":
- Choose the "Simple Setup" to get started immediately and use a pre-configured "luckycloud Directory" for easy and direct synchronization.
- Choose the "Advanced Setup" to access more configuration options and tailor the synchronization to your needs.
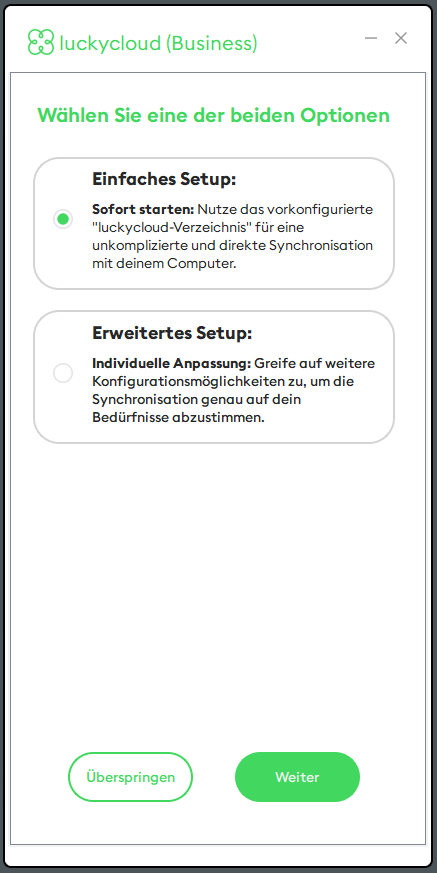
Simple Setup of the luckycloud Sync Client
- Select "Simple Setup" and click "Next".
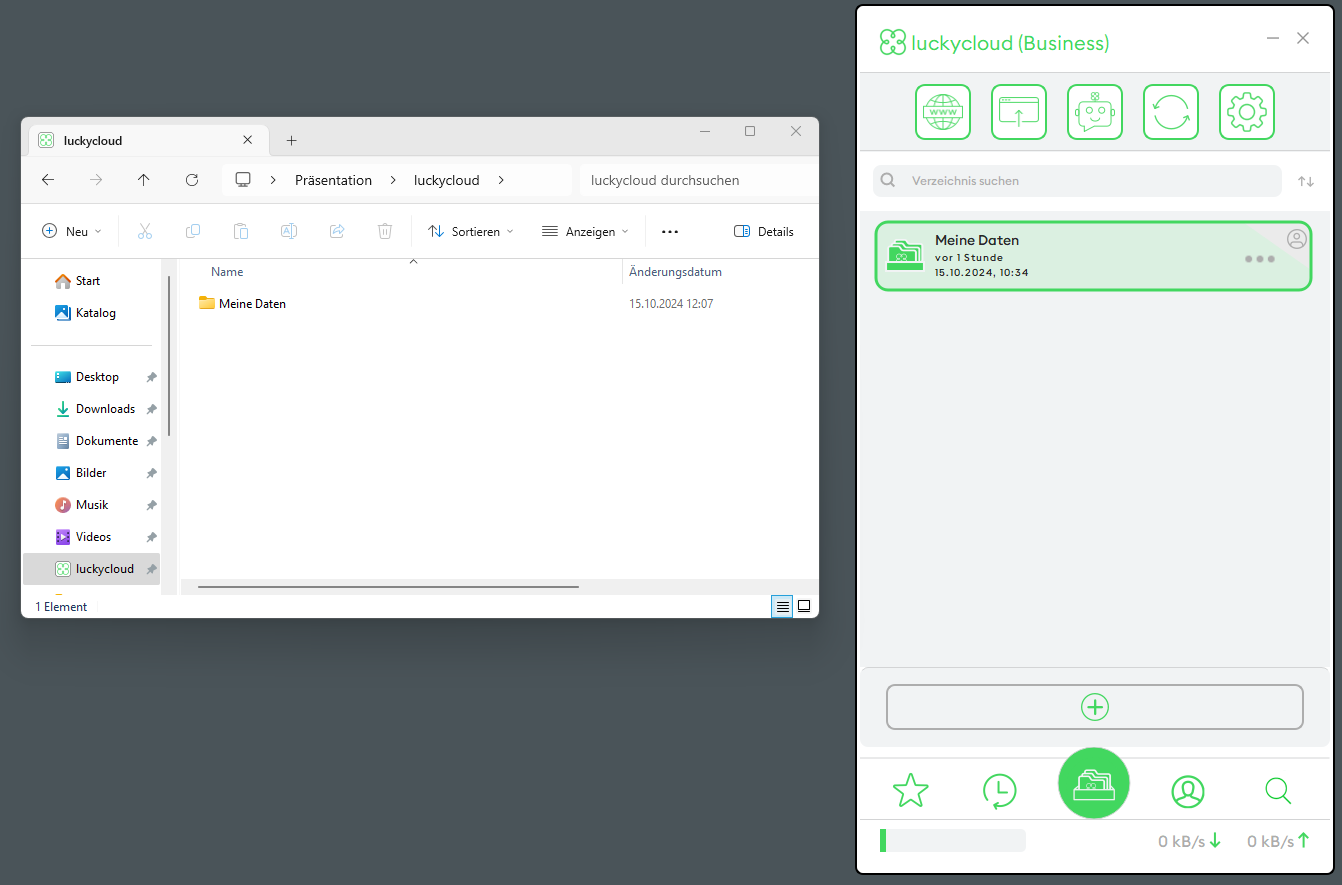
- You will now receive a summary of the selected configuration: The cloud directory "My Data" will be downloaded and synchronized as a local folder "My Data".
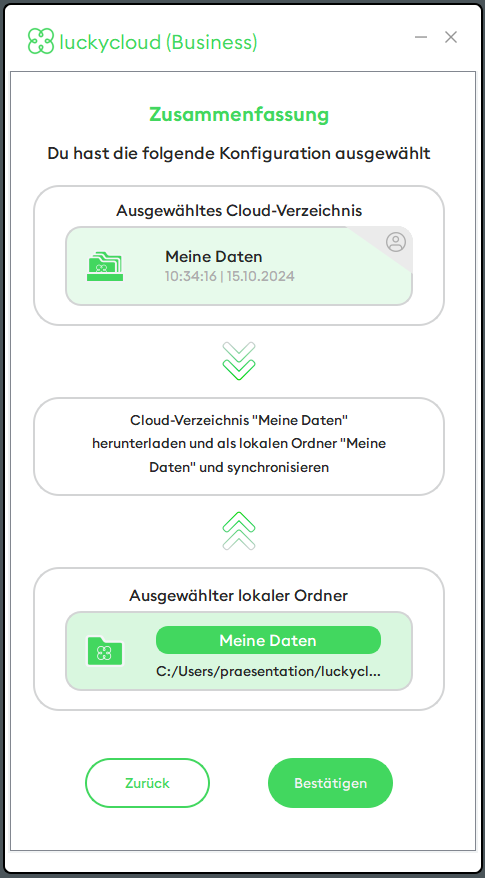
- Click "Confirm" to complete the "Simple Setup" and successfully set up the cloud directory "My Data" and the local folder "My Data".
If an error message occurs during login, check the following possible error sources:
- Is the capitalization correct?
- Is your password correct?
Please try to log in to the web interface with your credentials: - Is the correct server address entered?
- One/Teams: https://sync.luckycloud.de
- Business: https://storage.luckycloud.de
- Delete any spaces before or after your entries
Advanced Setup of the luckycloud Sync Client
- Select the "Advanced Setup" option and click "Next".
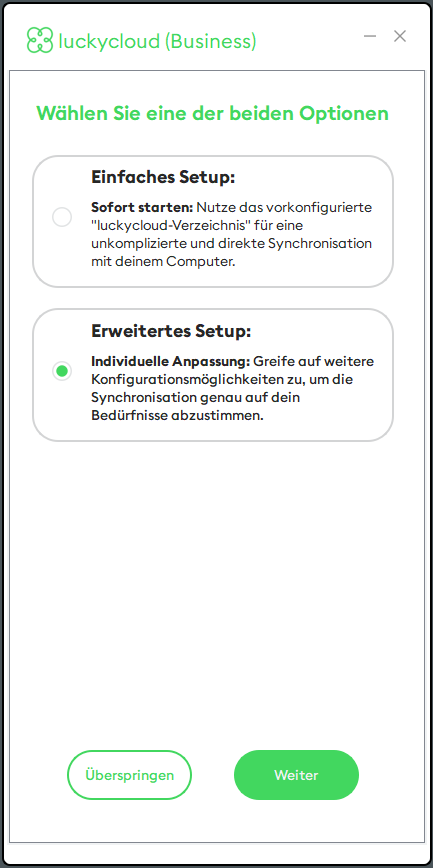
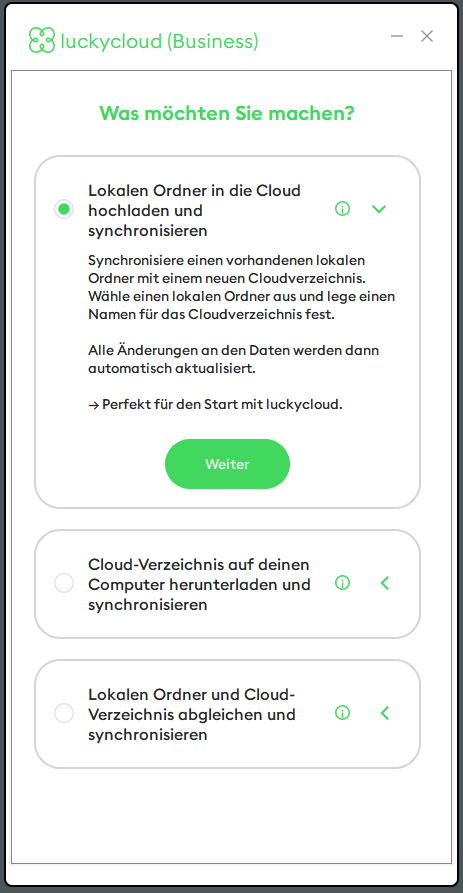
- In the next step, you can decide whether you want to
a. upload and synchronize a local folder to the cloud,
b. download and synchronize a cloud directory to your computer, or
c. match and synchronize a local folder and a cloud directory.
a. Upload and synchronize a local folder to the cloud
- Select this option and click "Next" to synchronize an existing local folder with a new cloud directory.
- Now select a local folder you want to synchronize by clicking the plus.
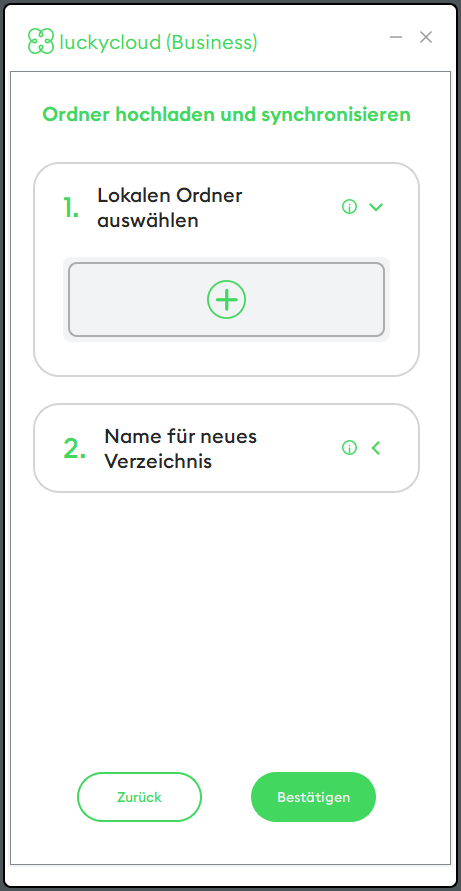
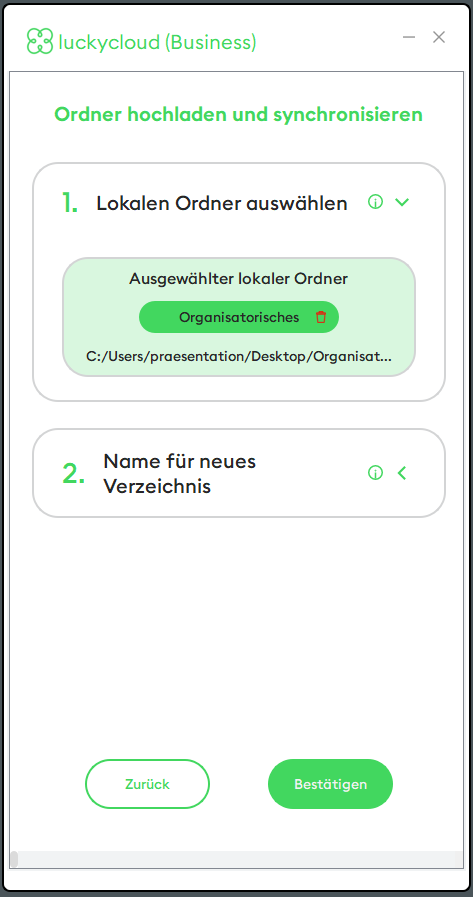
- Also, set a name for the cloud directory and click "Confirm".
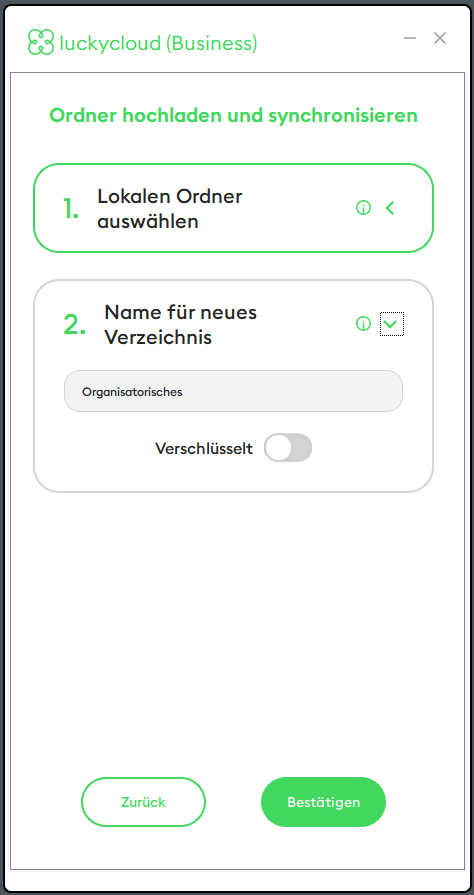
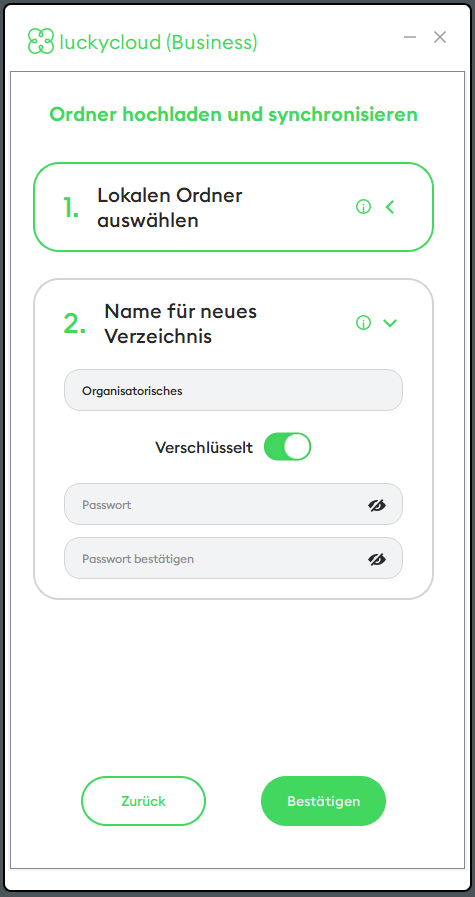
Here you also have the option to encrypt the newly created directory. Activate this option by sliding the toggle and creating a password for encryption.
- In the summary, you can review your selected configuration and edit it if necessary.
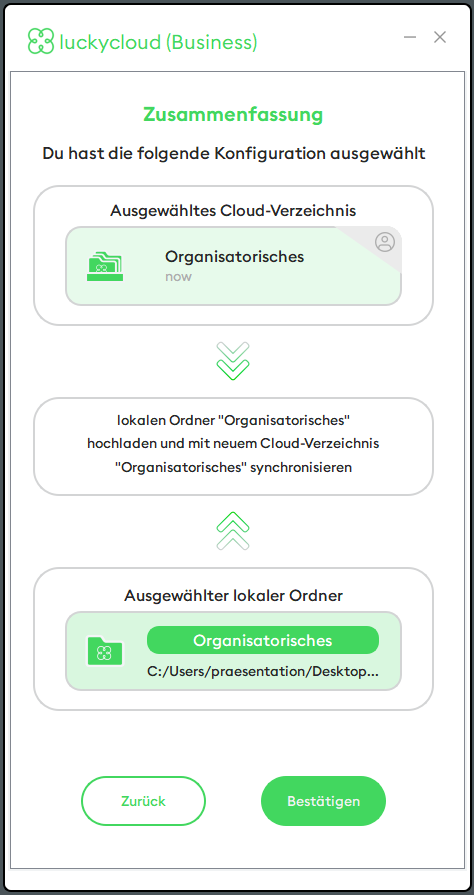
- Click "Confirm" to successfully set up the synchronization and finish the wizard.
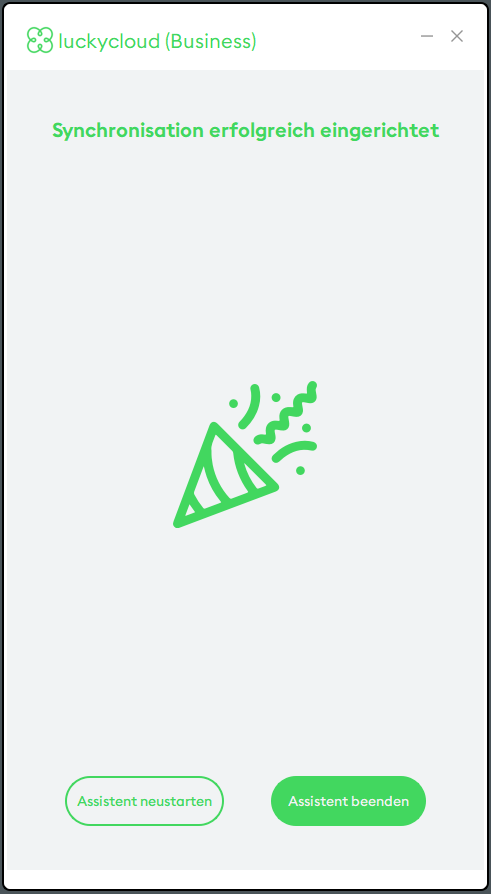
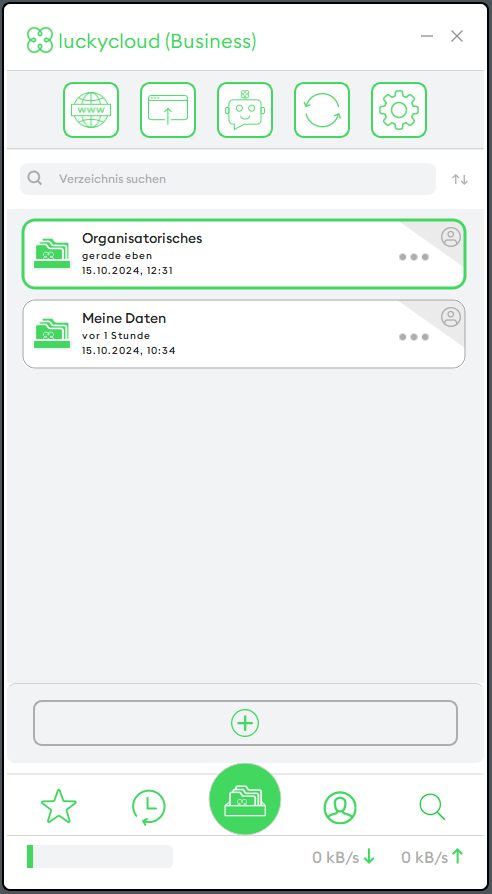
- Your newly synchronized cloud directory now appears in the overview.
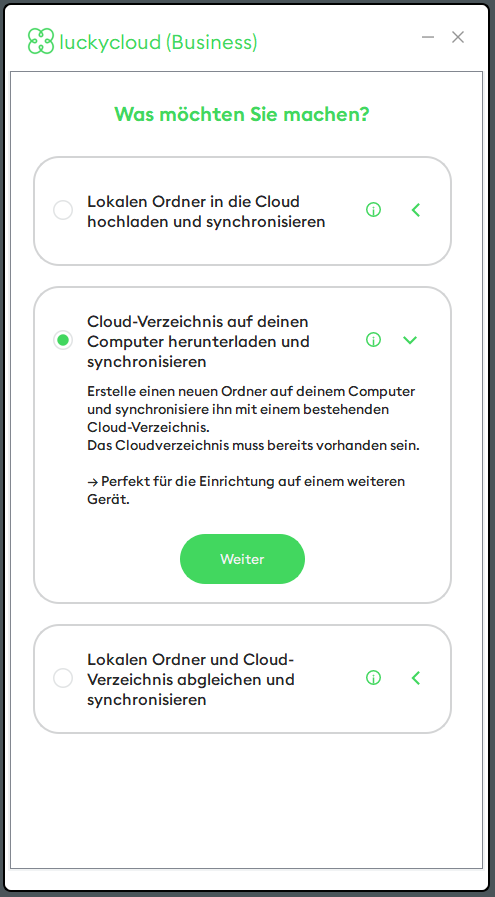
b. Download and synchronize a cloud directory to your computer
Use this option to create a new folder on your computer and synchronize it with an existing cloud directory.
- Select the option and click "Next".
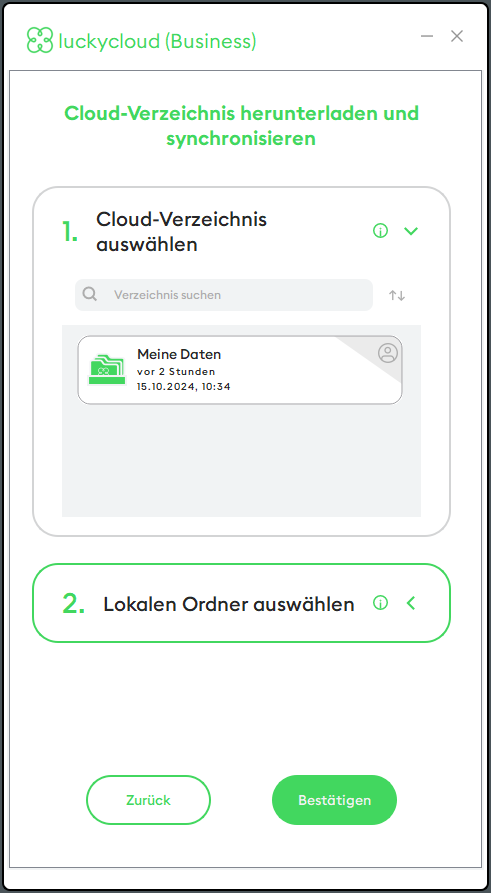
- Now specify the cloud directory you want to download and synchronize.
- Then select the local folder where the cloud directory should be downloaded and synchronized and click "Confirm".
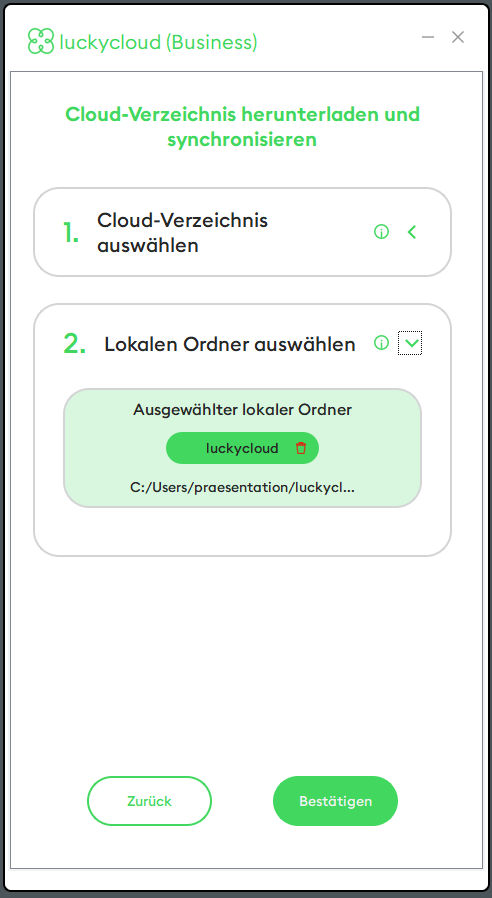
- In the summary, you can review your configurations again and edit them if necessary. Click "Confirm" to complete the process successfully.
c. Match and synchronize a local folder and a cloud directory
- If you want to match an existing local folder with an existing cloud directory, choose this option and click "Next".
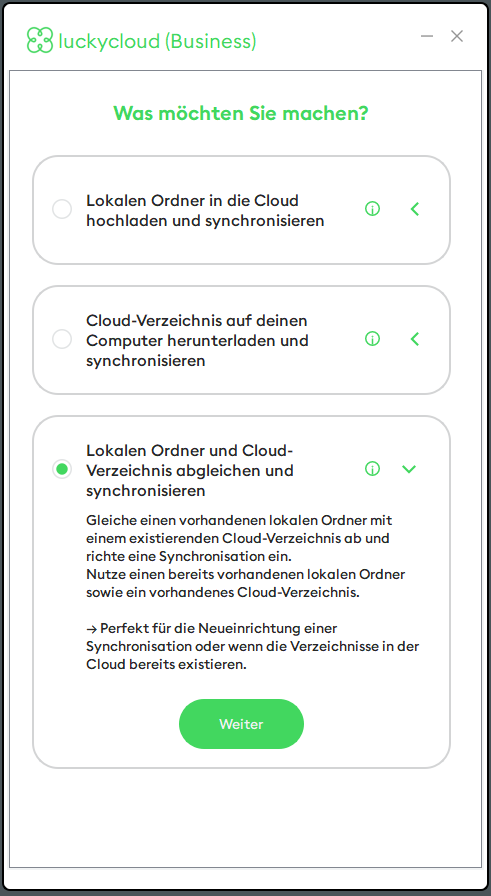
- First, select a cloud directory for synchronization.
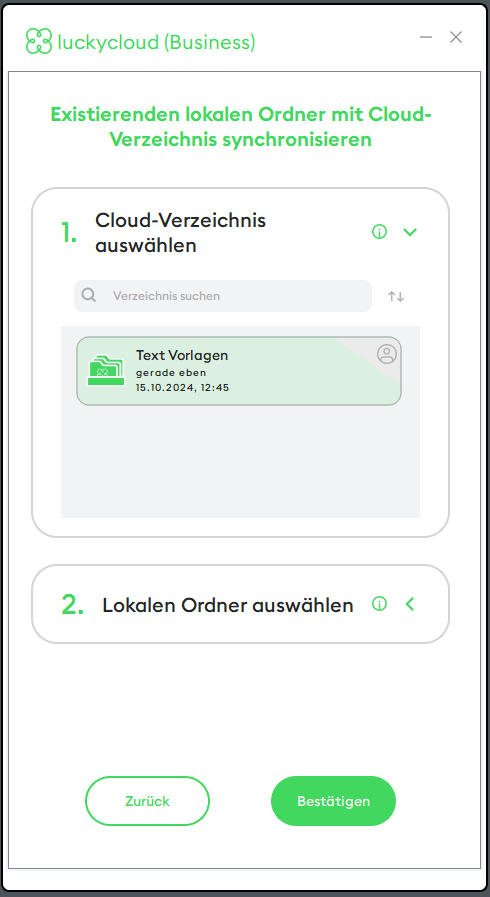
- Then specify a local folder for synchronization and confirm.

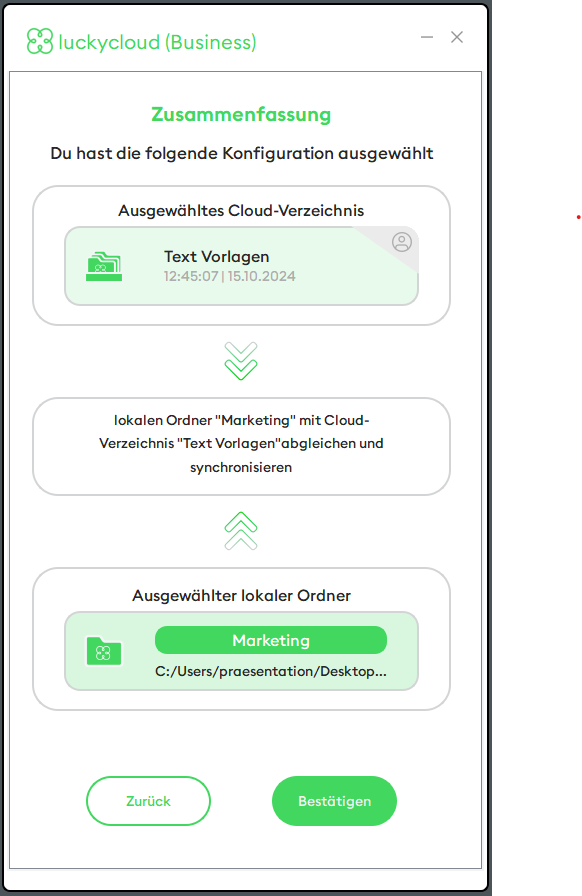
- Review your configuration in the summary. Click "Confirm" to successfully complete the selected synchronization.

View Favorites and History in the luckycloud Sync Client
By clicking on the star icon in the start view of the luckycloud Sync Client, you have one-click access to your favorite folders and directories.
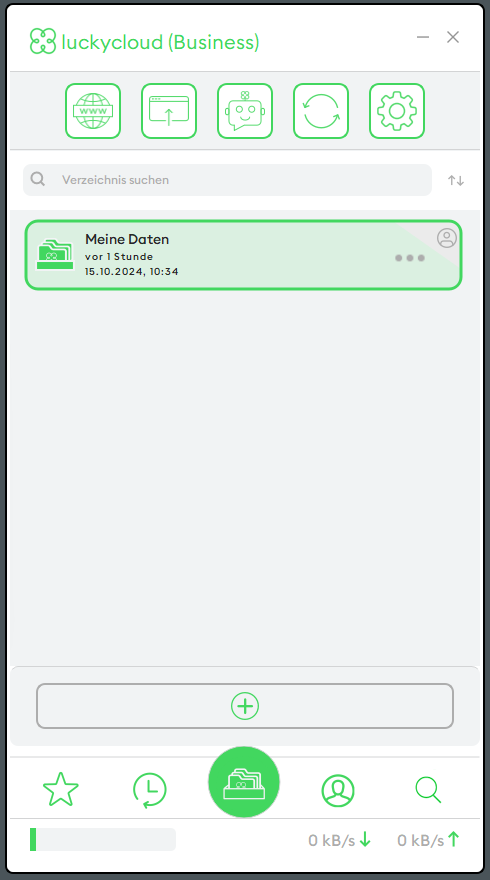
Clicking on the clock icon allows you to track recent changes to folders and directories at any time.
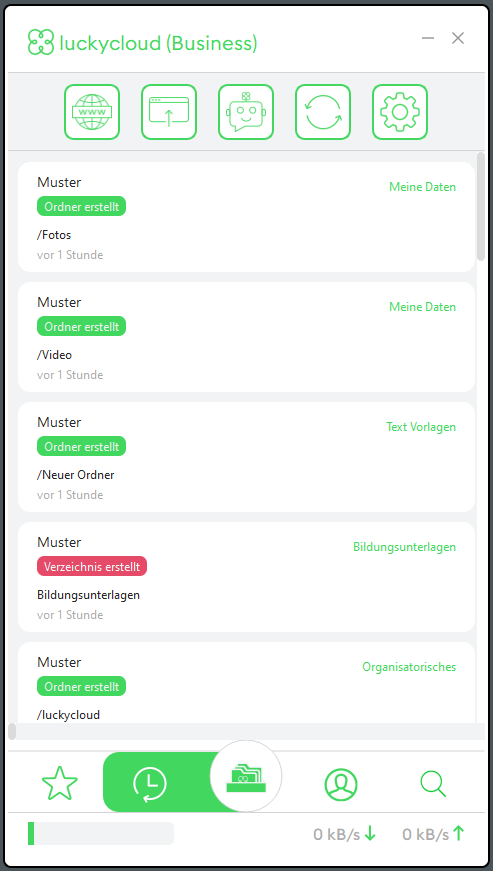
To add a new user account, click on the person icon in the start view of the luckycloud Sync Client and then on the green plus.
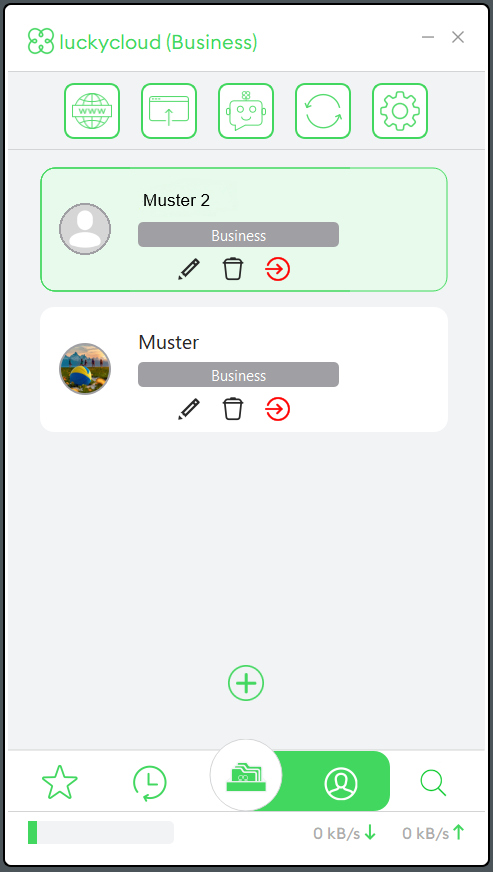
Note: The account you are currently active with is marked in green and is at the top of the list of accounts.
How do I synchronize my data with luckycloud?
After successful setup, there are three options for synchronizing folders with luckycloud in the future.

Clicking on the robot icon on the Sync Client's home page takes you to the corresponding overview:
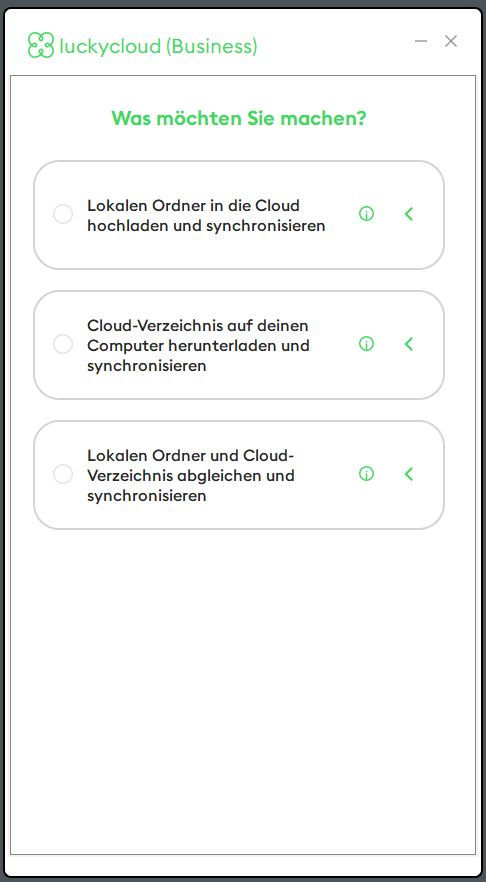
a. Upload and synchronize a local folder to the cloud:
With this option, you can easily start the process of uploading selected files from your computer to the cloud. This is especially useful if you want to create a secure copy of your data to protect against data loss due to hard drive failure, theft, or damage to your computer. You can simply bring your existing folder structure into the cloud.
- Select this option and click "Next" to synchronize an existing local folder with a new cloud directory.

- Now select a local folder you want to synchronize by clicking the plus.


- Also, set a name for the cloud directory and click "Confirm".

Here you also have the option to encrypt the newly created directory. Activate this option by sliding the toggle and creating a password for encryption.
To share encrypted directories, the user needs a luckycloud account and the corresponding password to access the data.
Note: Creating external share and upload links for encrypted directories is not possible. Please note that passwords for encrypted directories cannot be reset by us if lost. If you forget the password to a directory, it cannot be recovered. The reason is that luckycloud follows a zero-knowledge cloud principle, and we do not store directory passwords on our servers. Likewise, an encrypted directory cannot be subsequently freed from password protection. In this case, it is necessary to create a new unencrypted directory and upload the data again.

- In the summary, you can review your selected configuration and edit it if necessary.

- Click "Confirm" to successfully set up the synchronization and finish the wizard.

- Your newly synchronized cloud directory now appears in the overview.

b. Download cloud directory to your computer:
If you choose this option, you can access all files stored in the cloud directly from your computer.
- Select the option and click "Next".

- Now specify the cloud directory you want to download and synchronize.

- Then select the local folder where the cloud directory should be downloaded and synchronized and click "Confirm".

- In the summary, you can review your configurations again and edit them if necessary. Click "Confirm" to complete the process successfully.
c. Match and synchronize a local folder and a cloud directory
This option is ideal for ongoing work on projects stored both on your computer and in the cloud. By matching local folders with the corresponding cloud directory, you ensure that both locations contain the latest versions of the files.
- If you want to match an existing local folder with an existing cloud directory, choose this option and click "Next".

- First, select a cloud directory for synchronization.

- Then specify a local folder for synchronization and confirm.

- Review your configuration in the summary. Click "Confirm" to successfully complete the selected synchronization.

Note: A common source of error is that users open the corresponding folder with a double-click. Please ensure that the corresponding folder is only marked. Otherwise, the entire directory will be downloaded into a subfolder.
For files with the same name but different contents, so-called conflict files are created. Here you can learn how such conflict files arise and how you can resolve them.
Exclude files or folders from synchronization
In the Sync Client, you can exclude certain folders or files from synchronization. Here's how it works:
- Go to the respective directory where the file or folder is located that should not be synchronized.
- Create a txt file and name the file "luckycloud-ignore.txt".
- Open the "luckycloud-ignore.txt" file and write in the text field the file or folder name that should be excluded from synchronization. This tells the luckycloud server which files or folders should not be synchronized. Each line in the file represents either a specific file or a folder. If you want to mark something in the file as a comment, simply put a "#" at the beginning of the line. Blank lines are automatically ignored. Here are some examples:
Exclude files:
- To exclude a single file, use the full name:
MyDocument.txt
- To exclude multiple files, write each file in a separate text line.
MyDocument.txt Invoice.pdf
- Using a wildcard (*), you can exclude all files that have the same file format. This way, you can exclude all files that end with, for example, ".pdf". The asterisk replaces any number of characters.
- If you want to exclude a series of documents, such as MyDocument-1.odt to MyDocument-9.odt or from MyDocument-A.odt to MyDocument-X.odt, you can also specify that. The question mark (?) always replaces exactly one character. This way, only MyDocument-1.odt to MyDocument-9.odt are excluded from synchronization:
MyDocument-?.odt
Exclude folders:
- To exclude an entire folder from synchronization, add a slash "/" to the folder name.
MyFolder/
- You can also exclude specific files within a folder:
MyFolder/MyDocument.txt
- This also works for files of the same format. Here, the asterisk as a wildcard comes into play again. This way, all txt files in the selected folder are excluded from synchronization:
MyFolder/*.txt
- After entering the file or folder names to be excluded, save the created "luckycloud-ignore.txt" file in the first level of the respective directory (important: not in a subfolder).
- Now open the luckycloud Sync Client.
- If you have already set up a synchronization, right-click on the respective directory and select "Resync".
Otherwise, set up a synchronization as described here.
Right-clicking on a directory or clicking on the three dots opens a drop-down menu with various options:
- Open local folder: Opens the corresponding directory in a local folder
- Open in web browser: Opens the corresponding directory in the web browser
- Manually synchronize directory: Reloads the directories when clicked.
- Disconnect synchronization: Ends the synchronization after confirmation.
- Resync: Starts the synchronization anew after confirmation.
- Suspend synchronization: Pauses the synchronization until it is reactivated.
- Set sync interval: Here you can define how often your cloud directory should synchronize. Important: If you are working with a NAS device
End the Sync Client
The Sync Client continues to run in the background of your computer or laptop. Here's how to end the Sync Client on Windows:
- Open the programs running in the background. Click on the arrow at the bottom right of your taskbar:
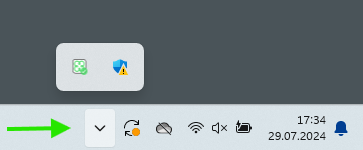
- A small window opens at the bottom right. The green icon is the luckycloud Sync Client. Right-click on the icon.
- Then select "Exit".
The background programs on macOS are displayed at the top right. Otherwise, the process is identical.
Disable Auto-Start of the Sync Client
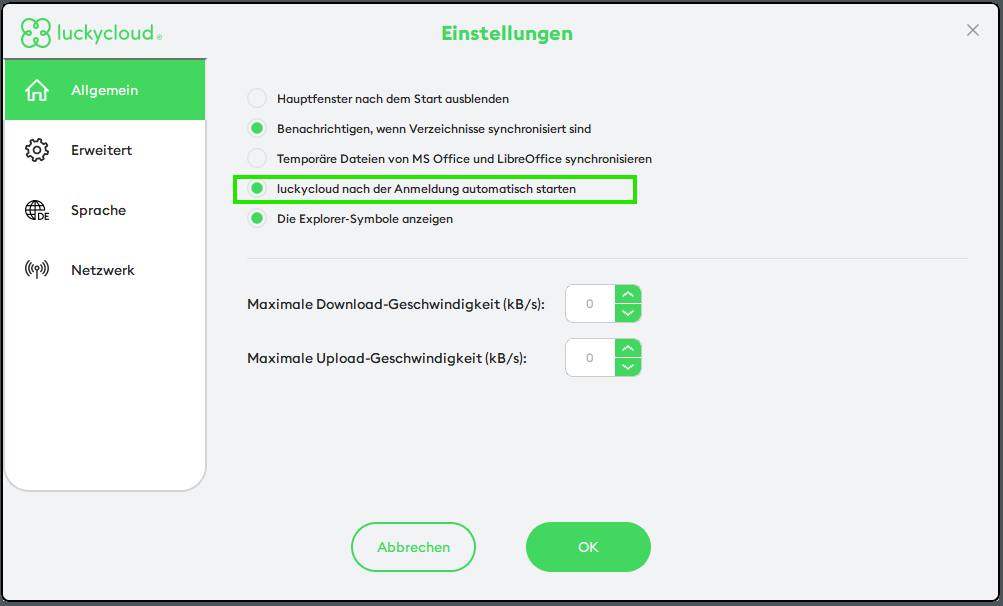
- Select the gear icon in the Sync Client to access the settings. Alternatively, right-click on the luckycloud Client icon in the background programs and select "Settings".
- A new window opens. Select the "General" tab there.
- Remove the selection at "Automatically start luckycloud after login".
Note: It can often be useful to specify in the Sync Client settings that the synchronization of a directory should not be disconnected despite a local error or a server error.
Do not disconnect synchronization of a directory despite a server error: This means that the synchronization between your local directory (folder) and the server remains active even if a server error occurs. The error could be, for example, that the server is temporarily unavailable. Instead of completely aborting the synchronization, the connection remains active and may automatically try again later to continue the synchronization process once the server is working again.
Do not disconnect synchronization of a directory despite a local error: This concerns errors that occur on the local system (i.e., your computer), for example, when files are renamed or moved. In such a case, the synchronization is also not aborted but remains. The Sync Client continues to try to perform the synchronization, even though a local error exists, until it is resolved or an alternative solution is found.
How do I set a synchronization interval?
To set a synchronization interval, right-click on a synchronized directory. A drop-down menu appears. Select the option "Set sync interval" there. Then you can enter the desired interval in seconds.
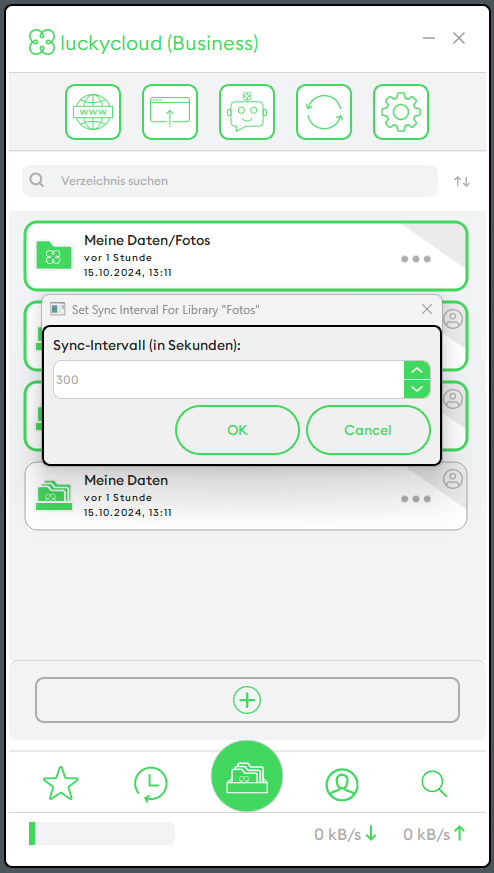
Note: It is especially important to define a synchronization interval if you are using a NAS device to ensure smooth synchronization.
How to activate the Dark Mode in the luckycloud Sync Client:
The Sync Client continues to run in the background of your computer or laptop. Here's how to activate the dark mode for the Sync Client:
- Open the programs running in the background. Click on the arrow at the bottom right of your taskbar:

- A small window opens at the bottom right. The green icon is the luckycloud Sync Client. Right-click on the icon.
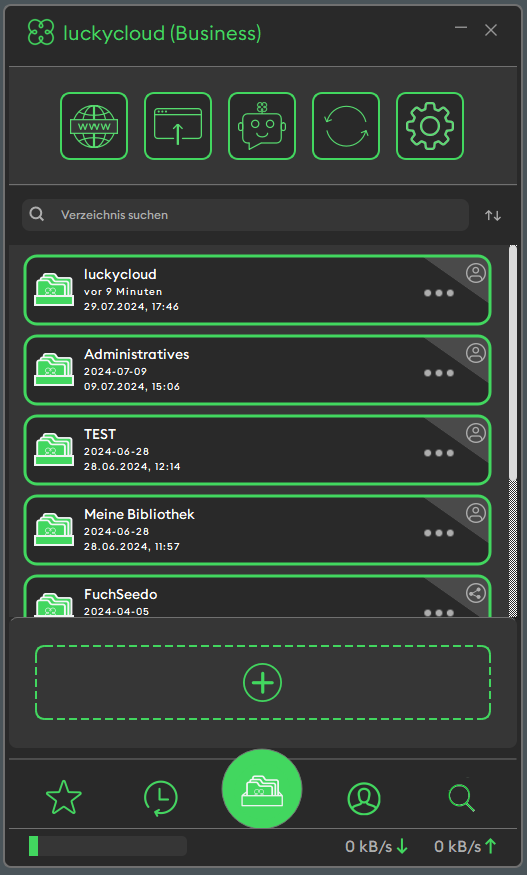
- Then select "Dark theme" and the Sync Client will appear in dark mode. Click "Default theme" to switch back to light mode.
Also interesting: How to set up user shares and create share links.