Integration of Clients
Integration of luckycloud Mail, CalDAV, and CardDAV
Here you will find out how to integrate luckycloud Mail into your devices.
luckycloud Mail
Thunderbird, Outlook, Bluemail etc.
CalDAV:
CardDav:
Mail Integration:
Thunderbird, Outlook, Bluemail etc.
Find out here how to integrate your luckycloud Mail for your applications.
In addition to the web-IMAP client from luckycloud, you can also easily integrate your email address into any desktop or mobile client with IMAP or POP.
- Install the appropriate desktop client, such as Thunderbird or Outlook, or mobile client, such as Bluemail.
- Go to Add Account and on mobile clients to "Other Servers".
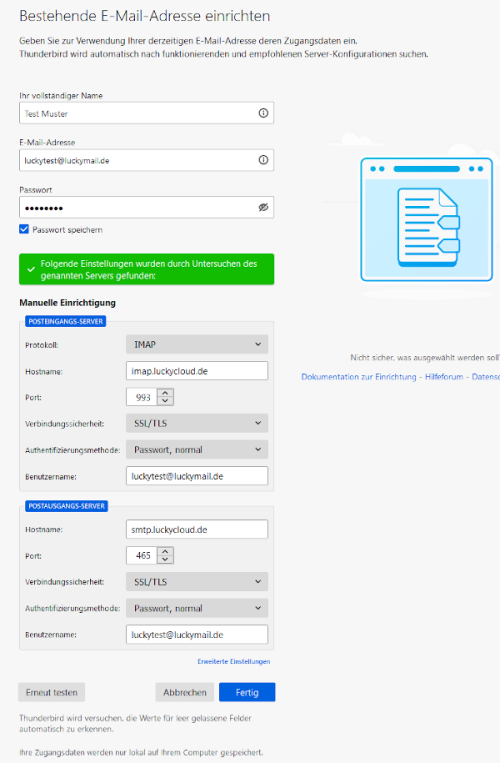
- Enter the following information:
IMAP and SMTP Mail Server Settings for luckycloud Mail
| Information | Incoming Mail | Outgoing Mail |
|---|---|---|
| User | Your full email address | Your full email address |
| Outgoing Mail Server | imap.luckycloud.de | smtp.luckycloud.de |
| Protocol | STARTTLS | STARTTLS |
| Port | 143 | 587 |
| Protocol | SSL | SSL |
| Port | 993 | 465 |
-
Confirm your entries. Now you can receive and send your emails as usual via the mail clients of your choice.
MacOS
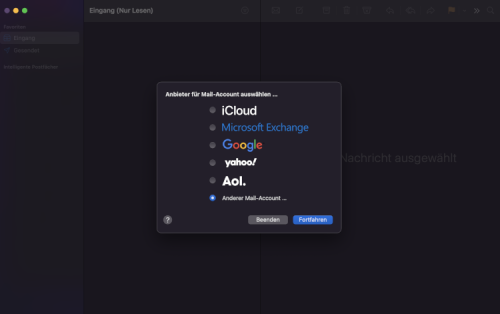
- Select "Add Account" in mail
- In the provider view, select "Other Mail Account: ..."
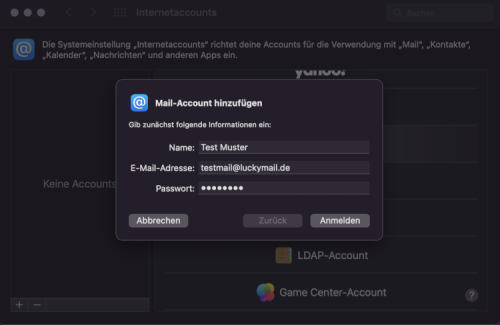
- Now first enter your login details.
- The advanced settings will now open.
- For "Username", please enter your email again
- "Incoming Mail Server": imap.luckycloud.de
- "Outgoing Mail Server": smtp.luckycloud.de
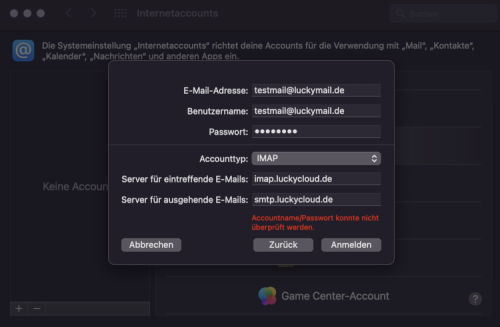
iPhone
- Select "Add Account" in mail
- In the provider view, select "Other Mail Account: ..."
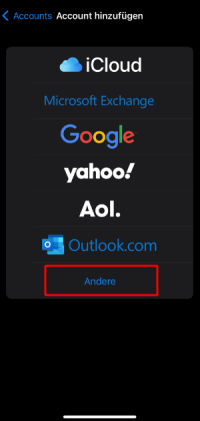
- Enter your login details now
- The advanced settings will now open.
-
Please enter the following data here:
a. Incoming Mail Server:
Hostname:         imap.luckycloud.de

Username:  Your email address at luckycloud Mail

Password:           Your luckycloud Mail password
b. Outgoing Mail Server:
Hostname:         smtp.luckycloud.de

Username:  Your email address at luckycloud Mail

Password:           Your luckycloud Mail password
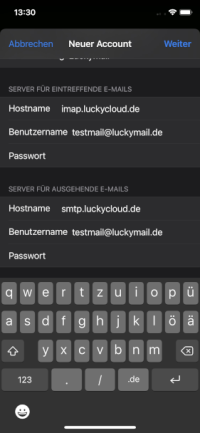
CalDAV Integration
Here's how you can integrate your calendars via CalDAV into your applications:
CalDAV in Thunderbird
- Open the calendar overview.
- Click on the "+" next to "Calendar".
- Then in the newly opened window select "On the Network" and click "Next".
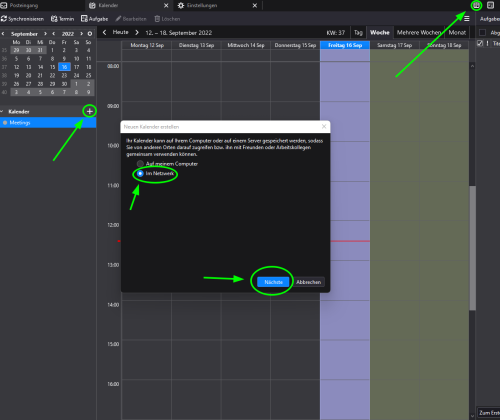
- Enter your luckycloud email address for "Username".
- For "Address", insert your luckycloud email address into the following link and then paste it: office.luckycloud.de/SOGo/dav/Your@luckycloud Mail-ADDRESS/Calendar/
- Now click on "Find Calendars".
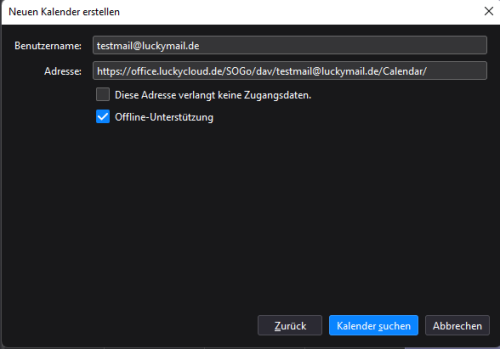
- You now need to enter the password for your luckycloud email address.
- A window will appear where you can select the calendars you want to integrate.
- Done
CalDAV in Android
To synchronize your calendars in Android, we recommend DAVx. You can get this app either in the Google Play Store for 5 € or download the alternative Play Store: F-Droid and get it for free.
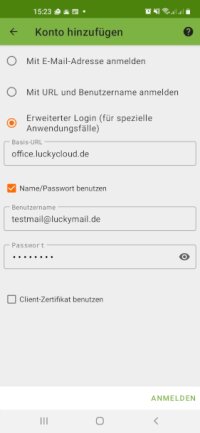
- Open DAVx and add a new account with the "+" at the bottom right.
- Click on "Advanced Login"
- Enter "office.luckycloud.de" for "Base URL".
- Check "Use Name/Password".
- Enter your login details
- Tap "Login"
CalDAV MacOS 12 and later
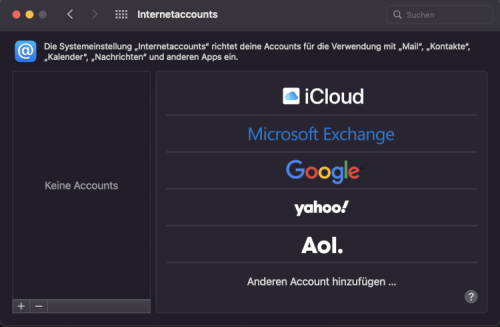
- Go to your settings to "Internet Accounts"
- Select "CalDAV Account"
- In the provider view, select "Other"
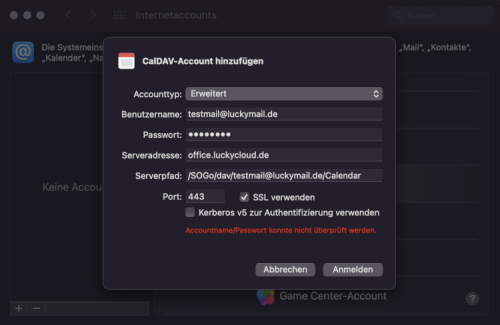
- Select "Advanced" for "Account Type".
- Enter your login details for "Username" and "Password".
- Server address: office.luckycloud.de
- For Server Path, insert your luckycloud email address into the following link and then paste it: /SOGo/dav/Your@luckycloud Mail-ADDRESS/
- Enter "Port" 443 and check "Use SSL".
- Done
CalDAV in iPhone
- Go to "Settings" to "Calendar"
- Open "Accounts"
- Select "Add Account"
- Select "Other" from the providers
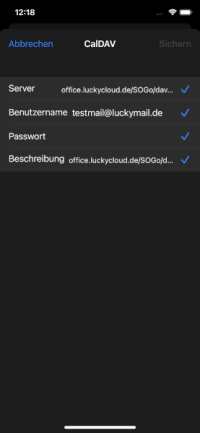
- "Add CalDav Account"
| Information | Entry |
|---|---|
| Server | office.luckycloud.de/SOGo/dav/Your@luckycloud Mail-ADDRESS/ |
| Username | Your@Email-Address |
| Password | Your Password |
| Description | luckycloud |
CardDAV Integration
CardDAV in Android
To synchronize your contacts in Android, we recommend DAVx. You can get this app either in the Google Play Store for 5 € or download the alternative Play Store: F-Droid and get it for free.
- Open DAVx and add a new account with the "+" at the bottom right.
- Click on "Advanced Login"
- Enter "office.luckycloud.de" for "Base URL".
- Check "Use Name/Password".
- Enter your login details
- Tap "Login"

CardDAV in MacOS 12
- Go to your settings to "Internet Accounts"
- In the provider view, select "Other" and then "CardDAV Account"
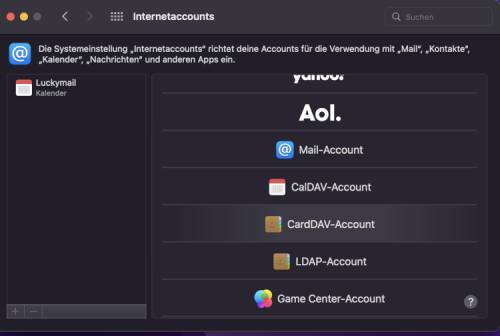
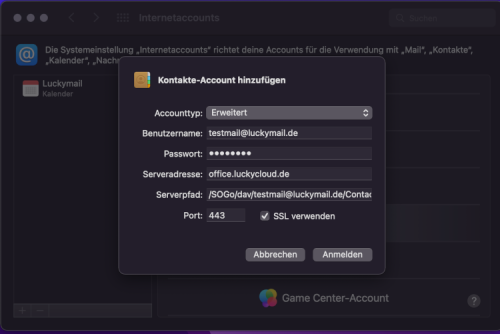
- Select "Advanced" for "Account Type".
- Enter your login details for "Username" and "Password".
- Server address: office.luckycloud.de
- For Server Path, insert your luckycloud email address into the following and then paste it into the field: /SOGo/dav/Your@luckycloud Mail-ADDRESS/
- Enter "Port" 443 and check "Use SSL".
- Done
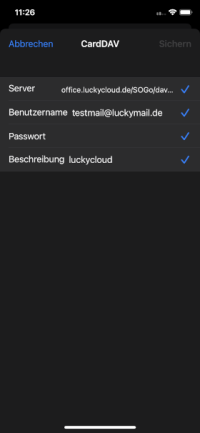
CardDAV in iPhone
- Go to "Settings" to "Contacts"
- Open "Accounts"
- Select "Add Account"
- Select "Other" from the providers
| Information | Entry |
|---|---|
| Server | office.luckycloud.de/SOGo/dav/Your@luckycloud Mail-ADDRESS/ |
| Username | Your@Email-Address |
| Password | Your Password |
| Description | luckycloud |
