Calendar Guide
Where do I need to log in?
- Log in to the Office area at https://office.luckycloud.de/.
- Enter your login details.
- Then click on the green arrow to log in.
How do I access the calendar area?
- Log in to the Office area at https://office.luckycloud.de/.
- Click on the Calendar icon at the top right.
- You are now in your calendar.

Where are the events?
- Log in to the Office area at https://office.luckycloud.de/.
- Click on the Calendar icon at the top right.
- On the left in the light gray field, you will see the selection "Events".
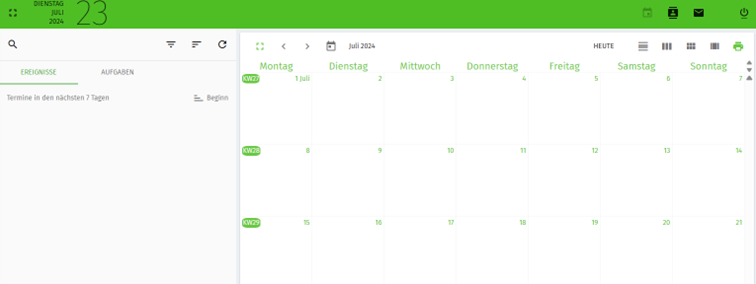
Where can I find the tasks?
- Log in to the Office area at https://office.luckycloud.de/.
- Click on the Calendar icon at the top right.
- On the left in the light gray field, you will find "Tasks".

Where can I create an appointment?
- Log in to the Office area at https://office.luckycloud.de/.
- Click on the Calendar icon at the top right.
- Under the dark green options field, you will find the green "+" icon for adding. Click on it.
- Now you can choose whether to create a new appointment or a new task. Go to "Create new appointment" (calendar icon) and enter all details.
- Click on "Save" at the bottom right to save your appointment.
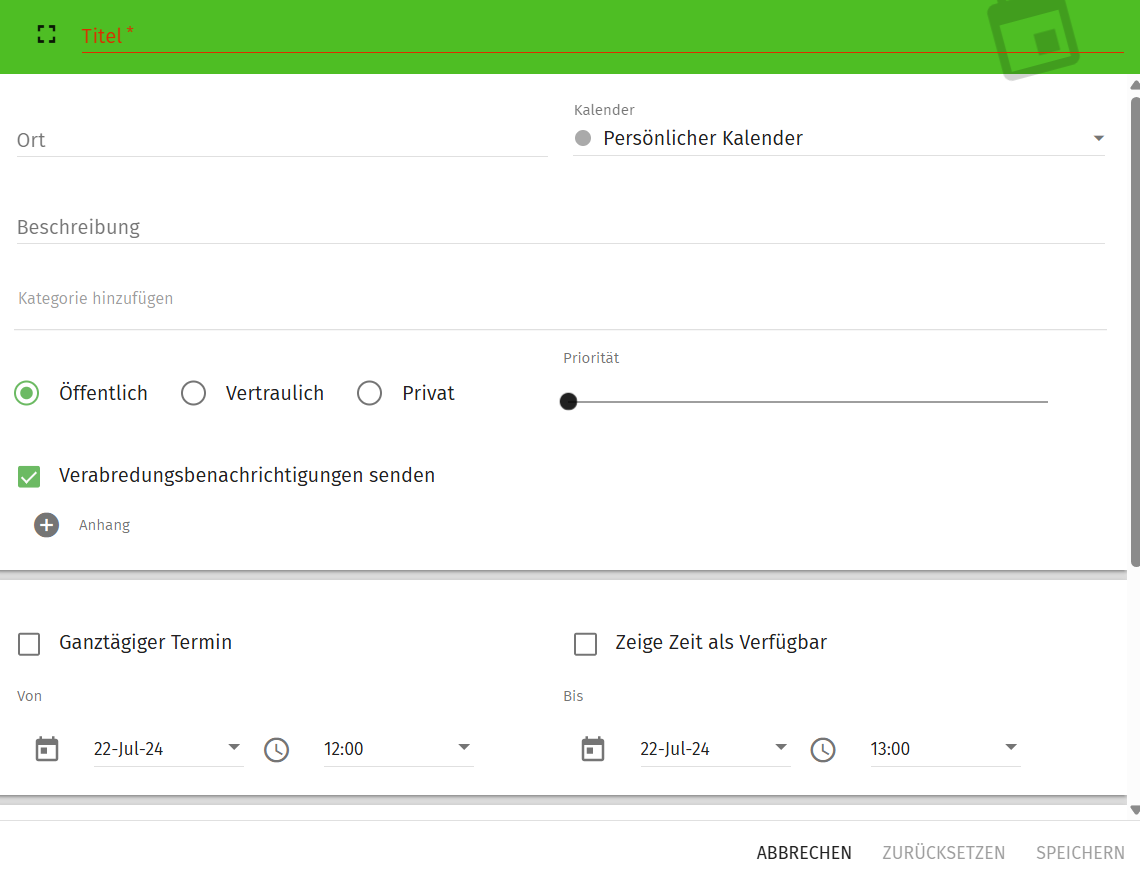
Note: You can also create a reminder! Scroll to the bottom of the "Create new appointment" window and check "Reminder". Specify the desired time frame and save the setting.

Where can I create a task?
- Log in to the Office area at https://office.luckycloud.de/.
- Click on the Calendar icon at the top right.
- Under the dark green options field, you will find the green "+" icon for adding. Click on it.
- Go to "Create new task" (clipboard icon) and save your details.
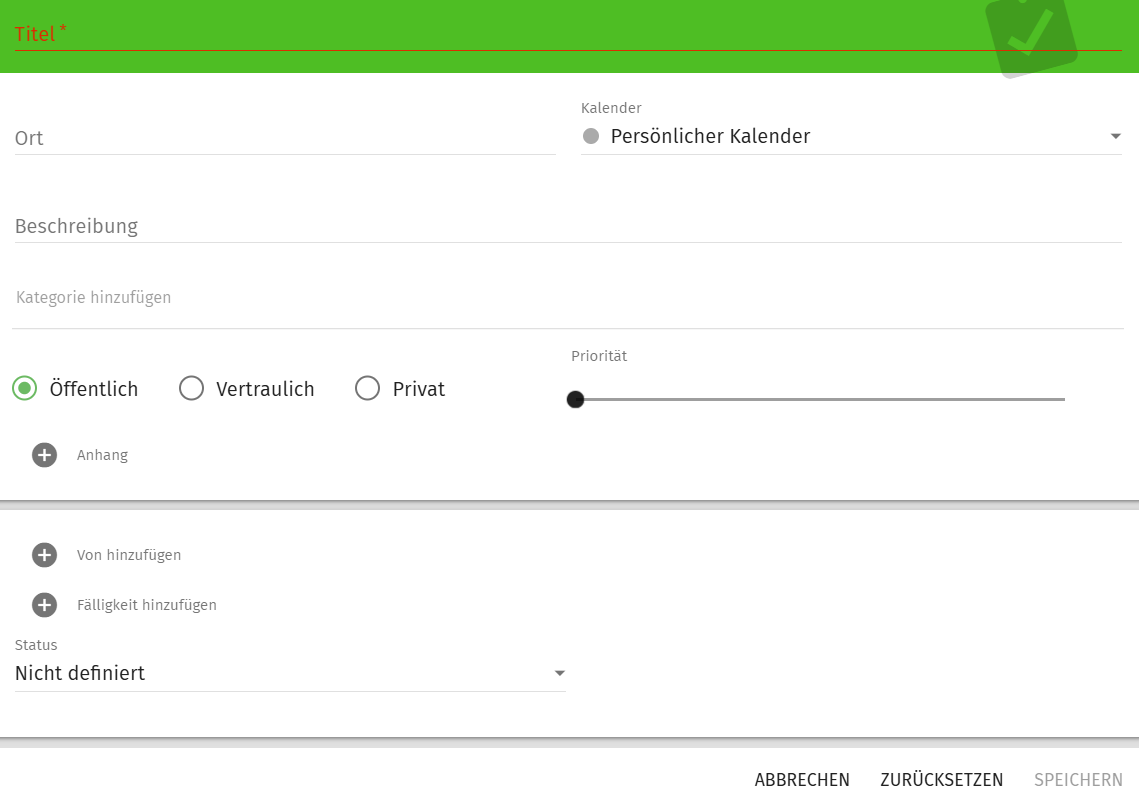
Note: Here you can also set priorities and status. To set the priority, simply slide the slider to the desired position (Priority 1: high, Priority 9: low). For the status, you have various options in the drop-down menu:
- "Response expected"
- "In progress"
- "Completed on"
- "Cancelled"
This way, you always stay organized!
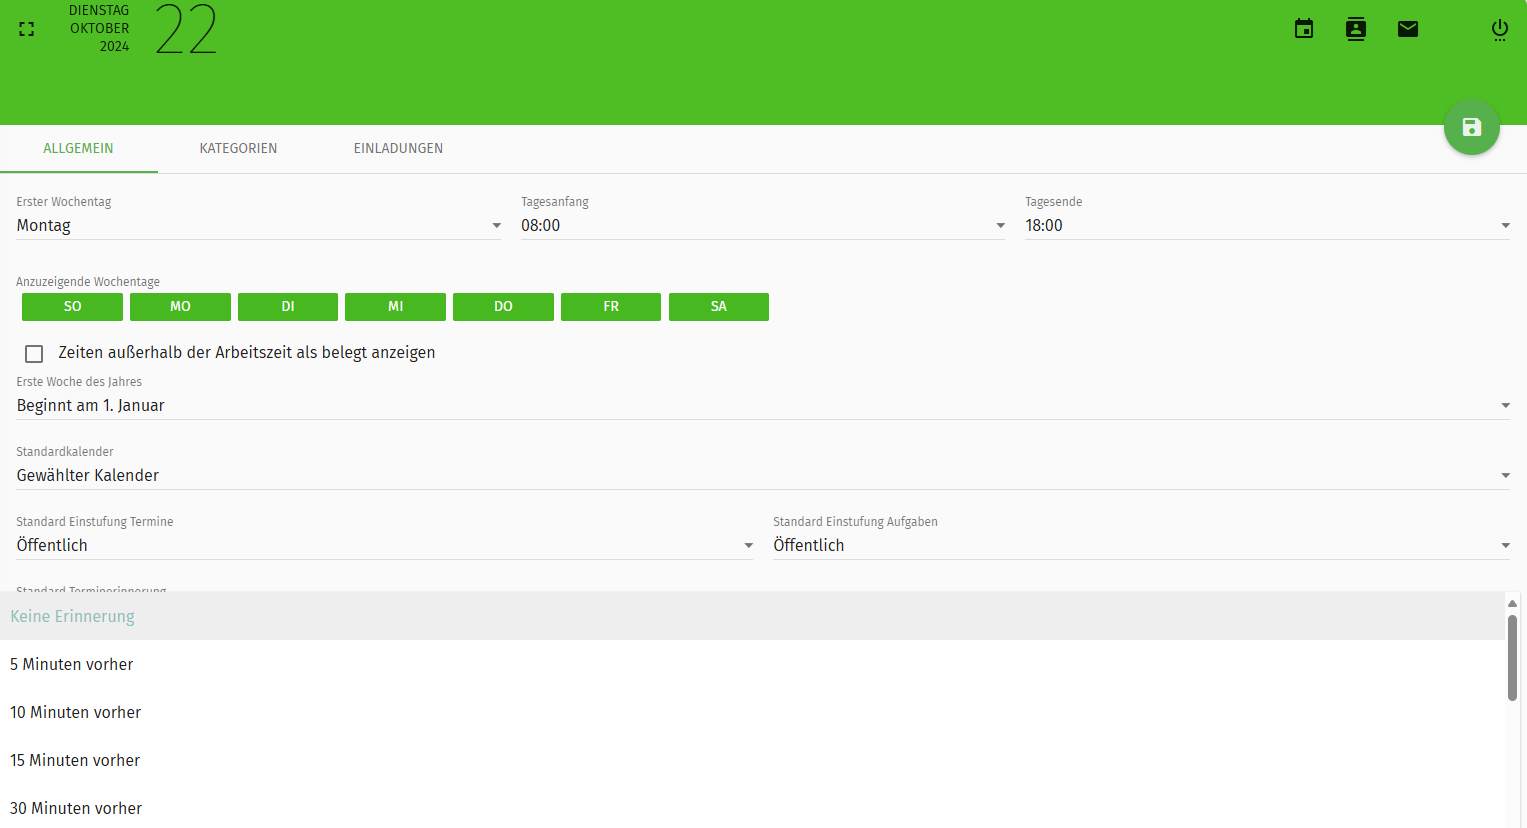
Where can I create an appointment reminder?
- Log in to the Office area at https://office.luckycloud.de/.
- Click on the "Settings" icon at the top left of the image.
- Click on "Calendar" on the left of the image and then go to "General" at the top of the image.
- Set your appointment reminder.
- The following options are available to you:
- "5 minutes before"
- "10 minutes before"
- "15 minutes before"
- "30 minutes before"
- "45 minutes before"
- "1 hour before"
- "2 hours before"
- "5 hours before"
- "15 hours before"
- "1 day before"
- "2 days before"
- "1 week before"
- Click on the green "Save" icon and complete the process.
How do I view, for example, "Today's Appointments"?
- Log in to the Office area at https://office.luckycloud.de/.
- Click on the "Calendar" icon at the top right.
- Under the dark green options field, you will find the "Sort" icon. Click on it.
- The following options are available to you:
- "All appointments"
- "Today's appointments"
- "Appointments in the next 7 days"
- "Appointments in the next 14 days"
- "Appointments in the next 31 days"
- "Appointments in this calendar month"
- "This year"
- "All future appointments"
- "Currently selected day"
How can I prevent appointment invitations?
- Log in to the Office area at https://office.luckycloud.de/.
- Click on the "Settings" icon at the top left of the image.
- Click on "Calendar" on the left of the image and then on "Invitations" at the top of the image.
- Check "Prevent being invited to appointments".
- Click on the green "Save" icon and complete the process.

Note: You can still create a whitelist for appointment invitations. Enter the email addresses of important people to continue receiving appointment invitations from them.
How do I enlarge the calendar view?
- Log in to the Office area at https://office.luckycloud.de/.
- Click on the "Calendar" icon at the top right.
- Go to the light green "Enlarge" icon at the top of the calendar and click on it.
Where can I view the full calendar version?
- Log in to the Office area at https://office.luckycloud.de/.
- In the middle at the top of the image, you will see the small gray "Calendar" icon.
- Hover over the calendar that opens in a small window.
- Use the mouse scroll wheel to scroll up and down to view past or upcoming months.
How do I view the previous or next month?
- Log in to the Office area at https://office.luckycloud.de/.
- Click on the "Calendar" icon at the top right.
- In the middle at the top of the image, you will see the symbols "<" (back) and ">" (forward). Click on them as desired.
How do I change the calendar view?
- Log in to the Office area at https://office.luckycloud.de/.
- Click on the "Calendar" icon at the top right.
- In the calendar, you will see several icons at the top right.
- You can set the following views:
- "One day with times" (3 horizontal stripes; middle stripe thick)
- "One week with times" (3 vertical stripes)
- "One month" (6 squares)
- "One day + time + personal calendar" (3 vertical stripes; middle stripe thick)
How do I configure the calendar view?
- Log in to the Office area at https://office.luckycloud.de/.
- Click on the "Settings" icon at the top right.
- Click on "Calendar" on the left of the image and then on "General" at the top of the image.
- Click on "First day of the week" and set it.
- Set the "Start of the day" and "End of the day".
- Click on the green "Save" icon (top right) and complete the process.
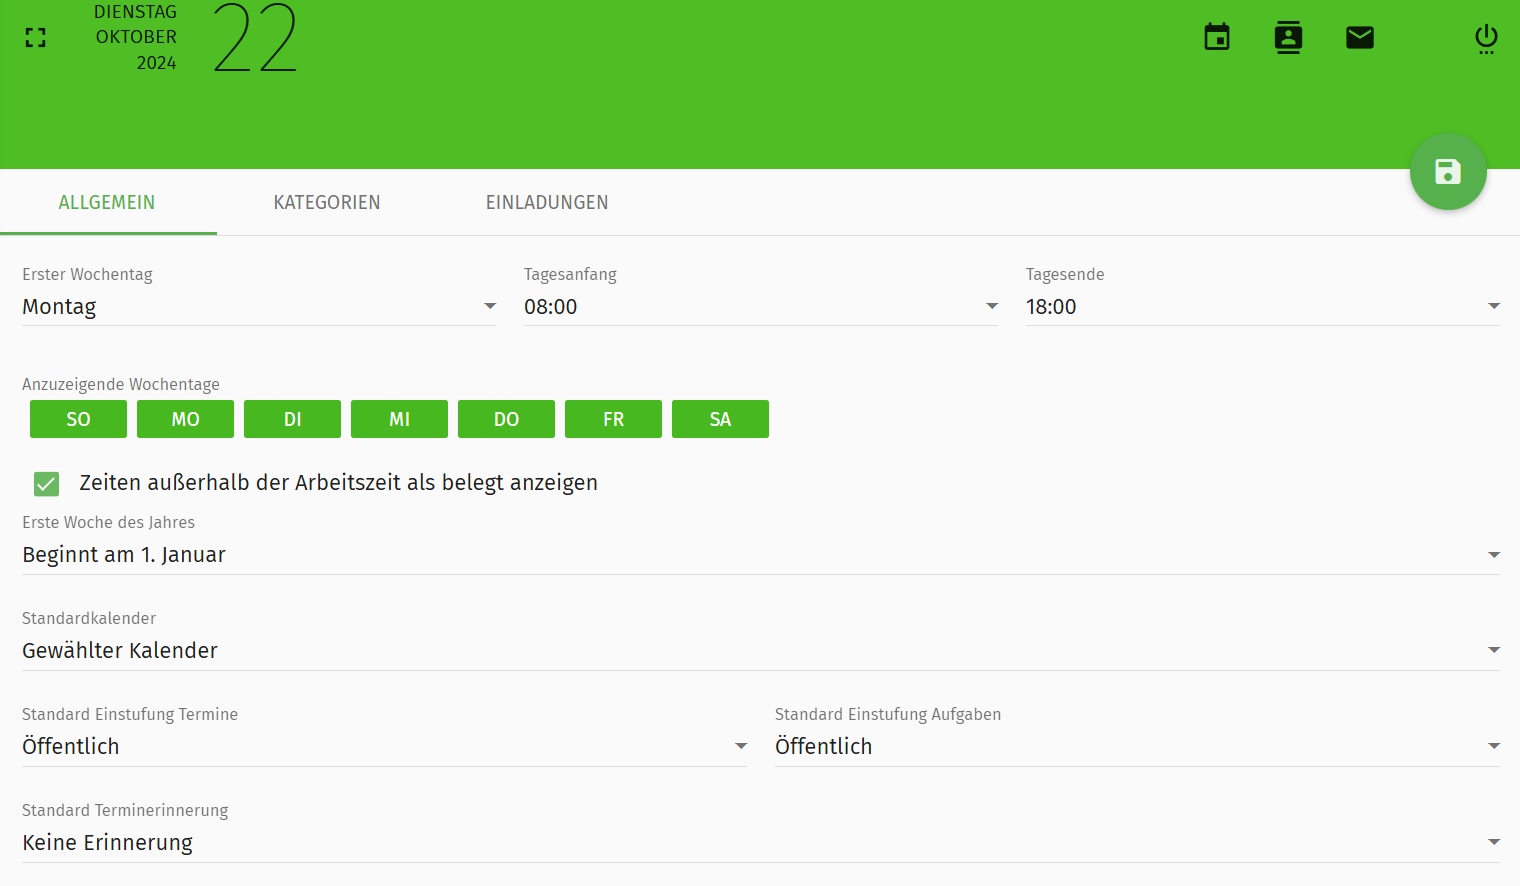
Where can I set which weekdays are displayed?
- Log in to the Office area at https://office.luckycloud.de/.
- Click on the "Settings" icon at the top right.
- Go to "Calendar" and then on "General" at the top of the image.
- Click on the desired days, for example, SA and SO.
- Click on the green "Save" icon (top right) and complete the process.
Where can I set the default calendar?
- Log in to the Office area at https://office.luckycloud.de/.
- Click on the "Settings" icon at the top right.
- Go to "Calendar" and then on "General" at the top of the image.
- Set your default calendar.
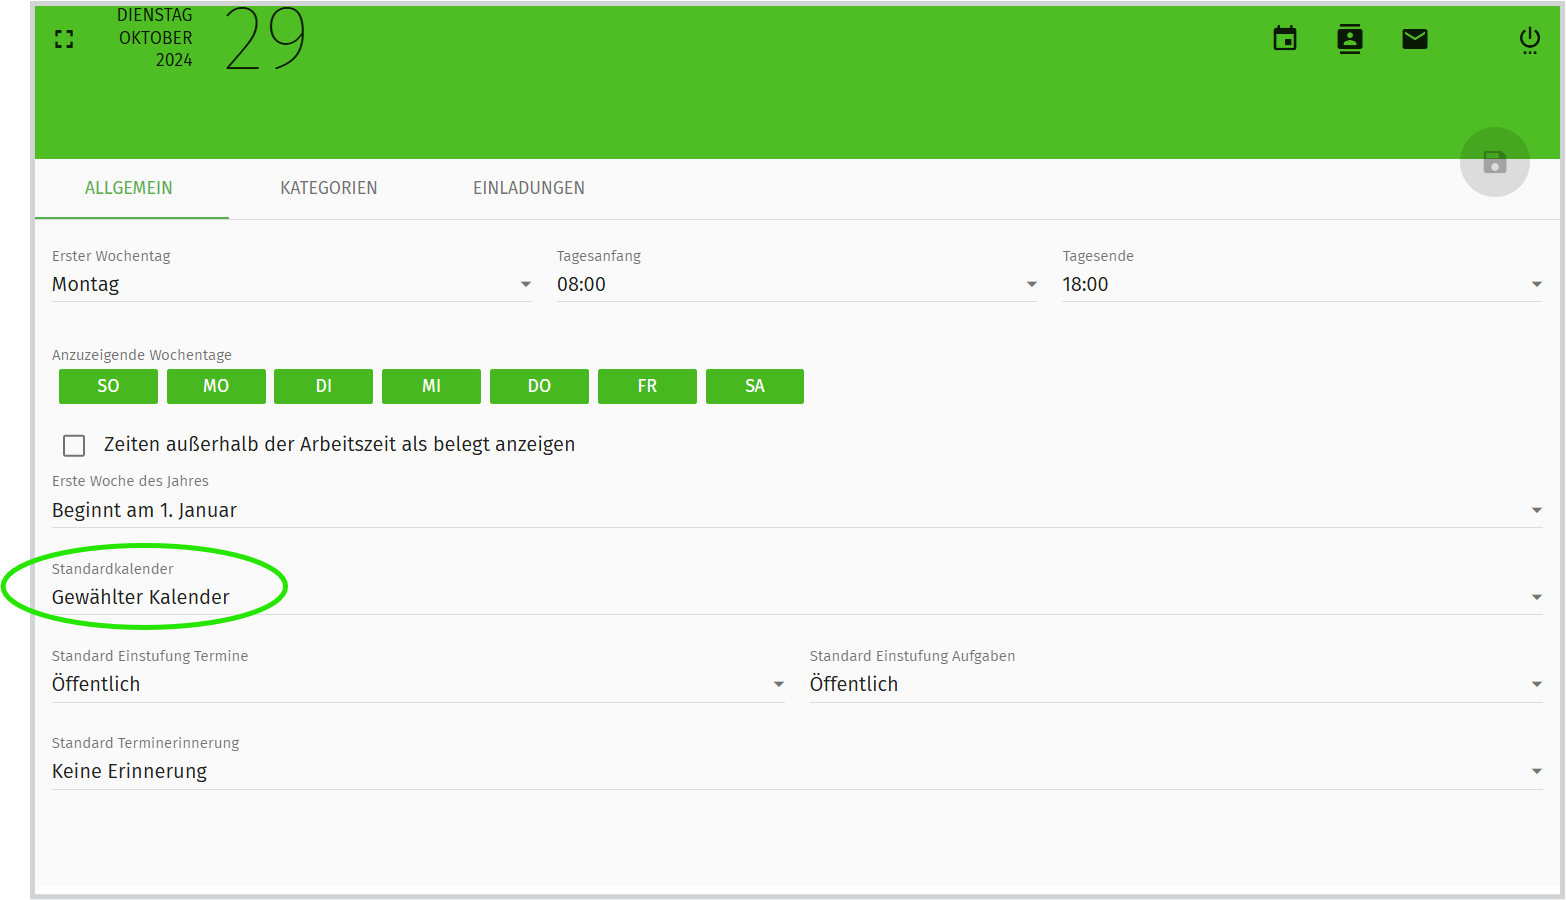
- You have three options:
- "Selected calendar"
- "Personal calendar"
- "First enabled calendar"
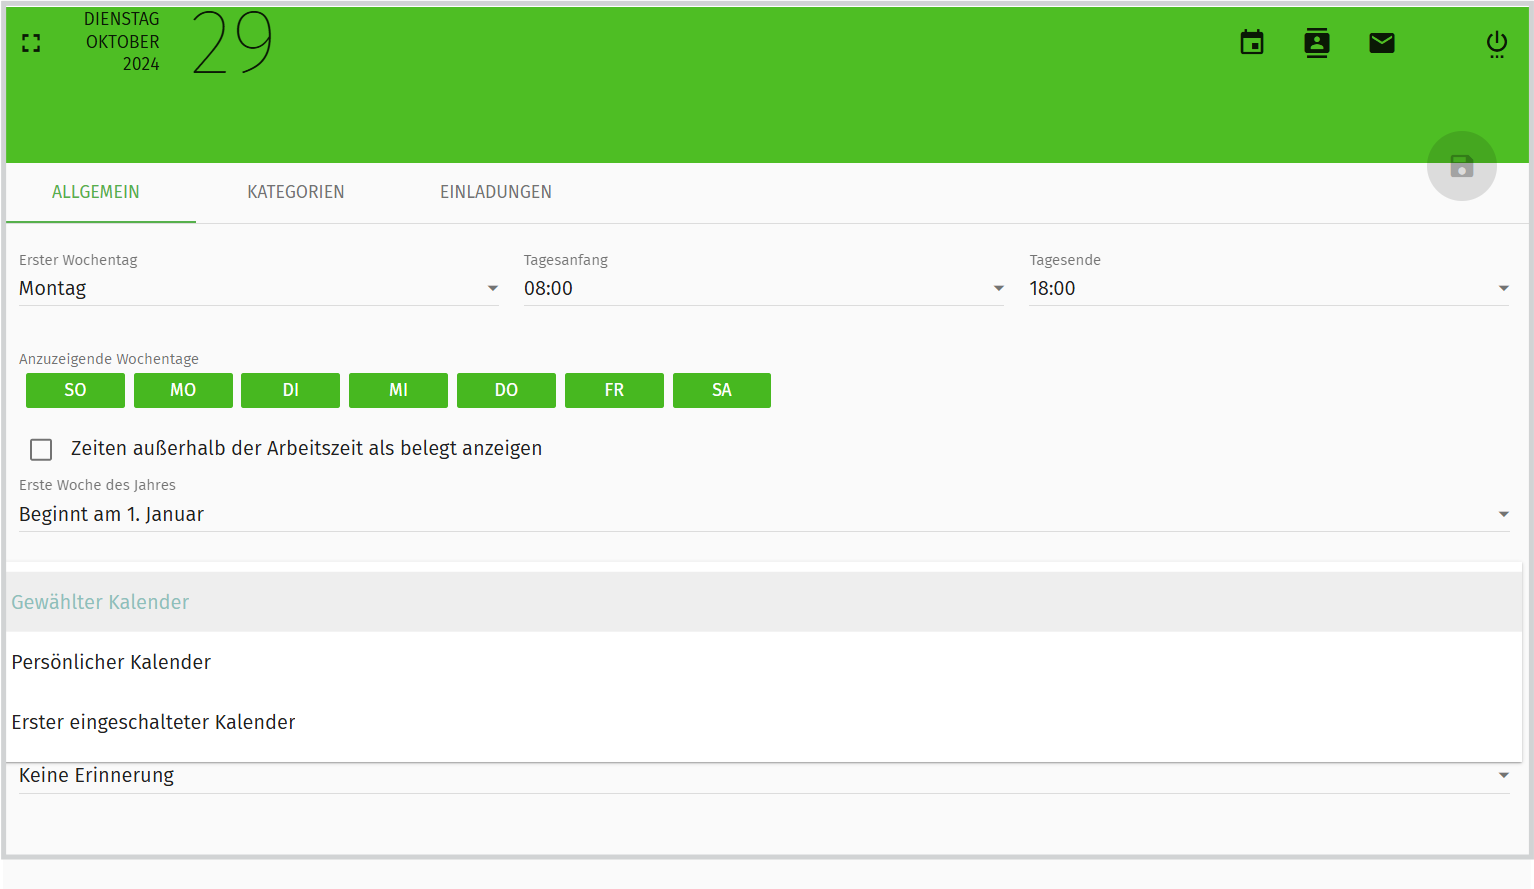
- Click on the green "Save" icon and complete the process.
How can I set the classification of a task?
- Log in to the Office area at https://office.luckycloud.de/.
- Click on the gear icon to access "Settings".
- Go to "Calendar" and then on "General" at the top of the image.
- Set your default calendar.
- You have three options:
- "Public"
- "Confidential"
- "Private"
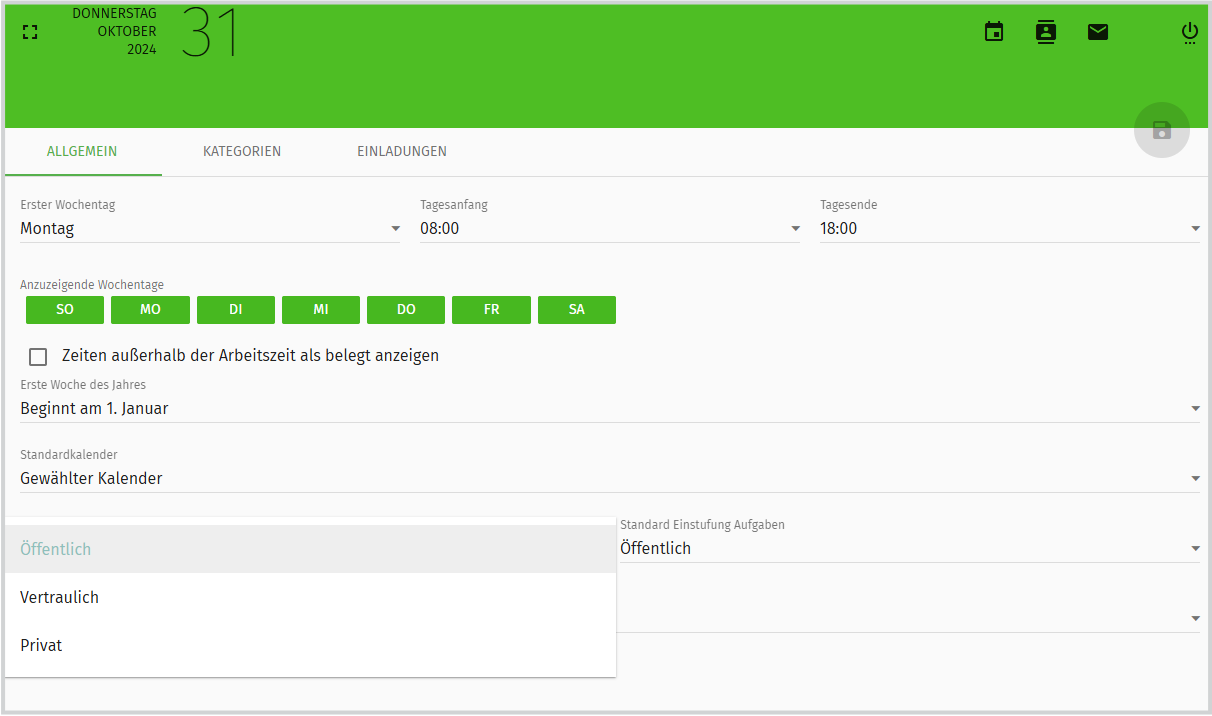
- Click on the green "Save" icon (top right) and complete the process.
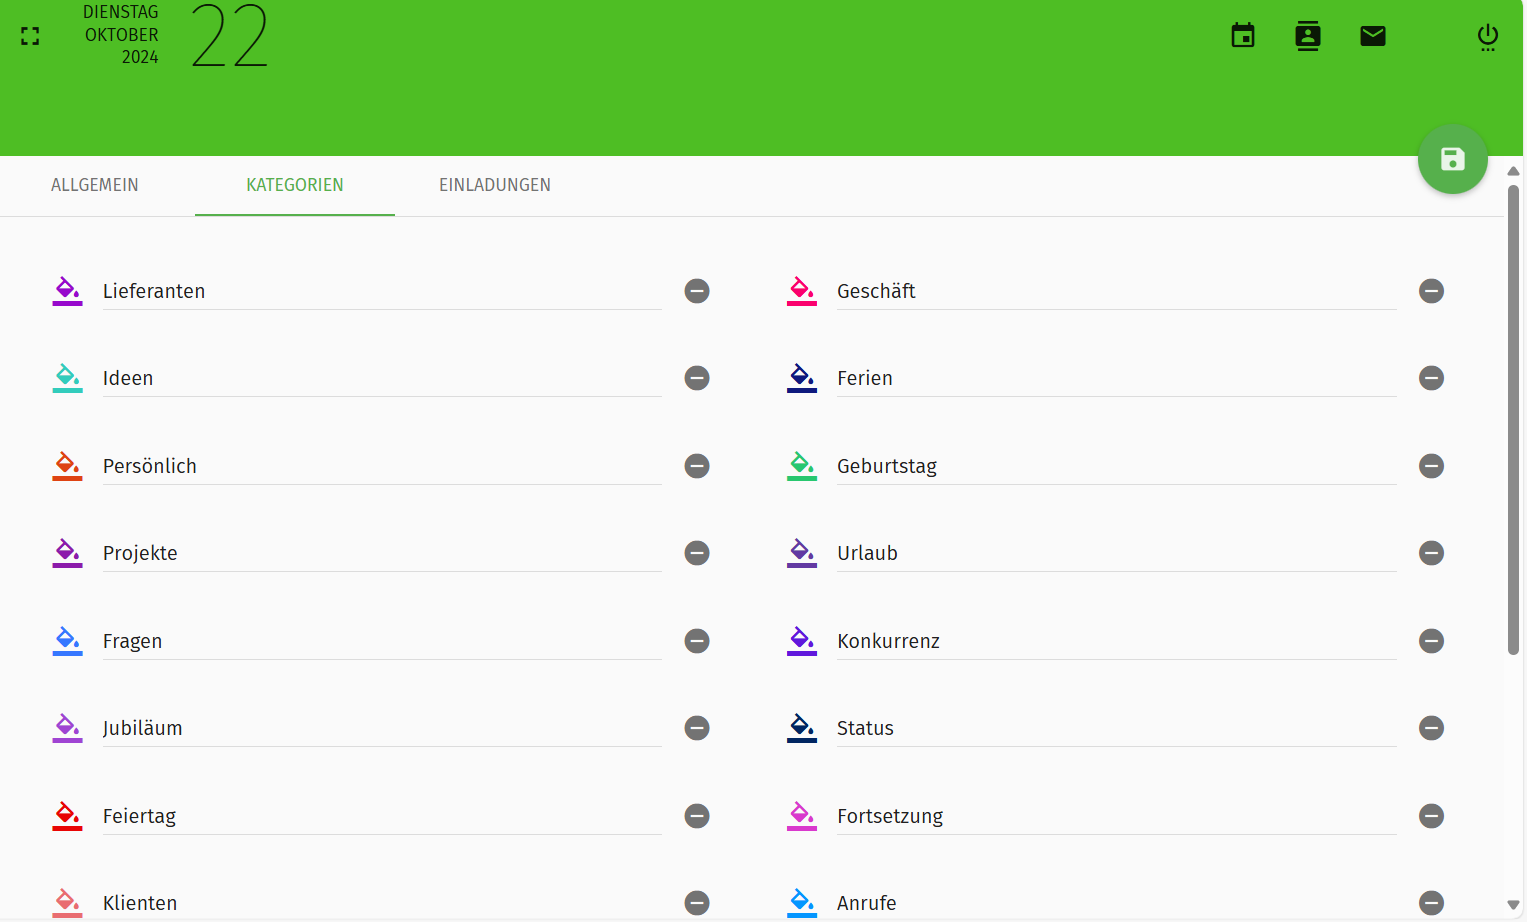
Where can I view the categories?
- Log in to the Office area at https://office.luckycloud.de/.
- Click on the "Settings" icon at the top right.
- Go to "Calendar" and then on "Categories" at the top of the image.
- Click on the green "Save" icon (top right) and complete the process.
Where can I create a category?
- Log in to the Office area at https://office.luckycloud.de/.
- Click on the "Settings" icon at the top right.
- Click on "Calendar" on the left and further up on "Categories".
- At the bottom right of the image, you will find "Add calendar category".
- Choose a color by clicking on the "Paint bucket" icon and give this category a name.
- Click on the green "Save" icon (top right) and complete the process.
